fbpx
Mr.LaundromatMr.Laundromat
5 Natural Stain Removers

The Top 5 Natural Stain Removers You Already Have at Home

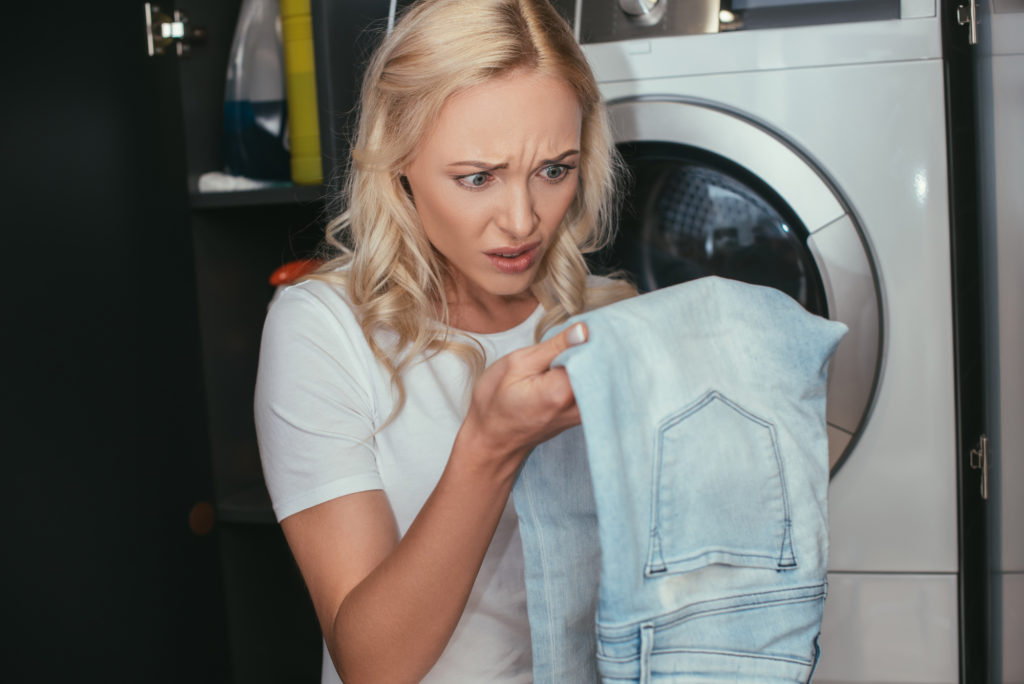
Let’s face it: stains are a pain. A small spill or accident can lead to your favorite clothes being ruined. To have the best chance of removing a stain, you should wash it as soon as possible and use a pre-treatment on the affected area. But what if you don’t have a stain remover on hand? Here are five of the best natural stain removers you probably already have at home.

White Vinegar. White vinegar is effective for removing sweat stains, mildew stains, and grass stains, among others. Its mold-killing properties also make it effective at removing odors. If you accidentally leave clothes in the machine overnight, you can add vinegar to a cycle to help prevent the musty smell that usually develops.

It is best to pre-treat the stained area of clothes with vinegar before adding them to the washer. Additionally, you should add a cup of vinegar to the rinse cycle. Adding vinegar any earlier in the wash can interfere with the detergent’s cleaning ability. Most laundry detergents are basic in nature. Since vinegar is acidic, adding it to the washer when soap is still present will neutralize the soap.

Note that white vinegar should be used rather than apple cider vinegar, as apple cider vinegar’s coloring can create a stain of its own. 

Baking Soda. That’s right, baking soda can be used for much more than bread and desserts. In addition to serving as a strong stain remover, baking soda boosts detergent’s effectiveness and acts as a softener. Even better, it is an effective odor removal agent as it helps kill odor-producing fungi.

Hydrogen peroxide. Commonly used as a disinfectant for first aid treatment of cuts or scrapes, hydrogen peroxide is also effective at fighting stains. Like bleach, it is an oxidizing agent, but it is much safer to handle. You can use hydrogen peroxide to remove red wine stains, sweat stains, mold stains, and stains from vegetables or fruit juice.

For best results, apply hydrogen peroxide to the stained area and allow it to sit for 10 minutes before placing it in the washing machine. Additionally, you can put a cup of hydrogen peroxide to the washer before adding water or other clothes. 

A word of caution: never combine hydrogen peroxide with chlorine bleach, ammonia, or other household cleaners. The chemical reaction can create dangerous odorless gases.

Lemon Juice. When life gives you lemons, use them to remove stains from white clothing. The acid in lemon juice serves as a natural bleaching compound. You can use it on white fabric– for example, removing sweat stains on the collars of white T-shirts. It is much safer and easier to handle than chlorine bleach. As an added bonus, your clothes will have a fresh lemon scent. 

One word of caution: because the citrus fruit’s acid functions as bleach, you should not use it on colored fabrics. If you accidentally get lemon juice on a nonwhite garment, you should rinse it under a facet immediately and then wash it.

Bonus Tip: Always spot test a stain remover on a garment before treating the stained area or using it in a wash. As with any cleaning solution, there is always the possibility that it can make the color bleed or cause discoloration. To do a spot test, dip a Q-tip into the stain removing solution. Press it onto an out-of-sign area of the garment you plan to use it on, such as a hem or inner pocket, and rub it gently against the cloth. If dye comes off onto the Q-tip, it’s a good sign you shouldn’t use the stain remover on that piece of clothing.

Stains can be frustrating, but when they are treated swiftly and correctly, you can save your favorite clothes from the donation pile.

Tips for Washing Jeans to Keep Them at Their Best

Tips for Washing Jeans to Keep Them at Their Best

Jeans are a staple of every wardrobe: they’re durable, comfortable, and they can be a part of almost any casual outfit. When properly cared for, they can last for many years without wearing out or losing their color. Here are seven tips for washing and drying your jeans to ensure they have the longest lifespan possible.

Wash jeans every 5-10 uses.  If you largely wear jeans during sedentary activities or social gatherings, you can go longer between washes.  However, if you wear your jeans in hot or humid weather, or during strenuous activities (such as landscaping or cleaning up the yard), you will need to wash them more often. Additionally, you should always wash jeans right away if they begin to have an odor or become visibly dirty. 

Turn jeans inside out before placing them in the washer. This ensures  that the part that has the most contact with your skin—and therefore dirt, oil, and sweat—has the most exposure to soapy water, and the side with the most blue dye as the least exposure. It may seem like an inconvenience to stop to turn them inside out every time, but this simple step helps the color of your jeans last longer without fading.

Zip up your jeans completely before putting them in the washer. This prevents the zipper’s teeth from tearing or fraying the fabric. You should also button them to ensure the zipper doesn’t come undone while the washer is running.

Use cold water. High temperatures can damage lycra and spandex, materials commonly used in stretch jeans. Hot water can also cause colors to fade more quickly. It is best to wash jeans in cold, or at least lukewarm, water at all times.

Use a Delicate cycle. Although denim is regarded as a sturdy fabric, it is best to wash it using the machine’s “Delicate” cycle to ensure your jeans last long, retain their color, and hold their shape. Keep in mind that denim typically shrinks after the first wash or two, but it should stay the same from then on.

Air dry jeans rather than putting them in a dryer. Like wool sweaters, heat causes jeans to shrink significantly. You should put them on a hanger or dry rack in a well-ventilated area instead of putting them in a dryer. If you must put them in a dryer, use a “no-heat” setting. Even a low-heat setting like permanent press can cause jeans to shrink enough to become unwearable.

Wash jeans with like colors. You may be nervous about washing new jeans with other clothes, but it is safe to wash them with similar colors, such as black or dark blue. However, be careful not to wash them with clothes or items that will shed lint, such as towels or sweaters.

Use a clip to keep fraying edges or holes from worsening. If your jeans have holes, rips, or frayed areas—whether from wear or a fashion choice— a washing machine will make them worse. Fortunately, there’s a simple trick you can use to avoid taking a trip to the tailor before washing them. Use a clip to hold the edges together. Sock clips, created to keep matching socks together in the washing machine, will do the job well. In contrast, clothespins will come off in the wash cycle, so you should not use these to prevent tears from growing.

How to Use Chlorine Bleach Safely

How to Use Chlorine Bleach Safely

In our last blog, we shared best practices for using oxygen bleach, commonly known as All-Fabric Bleach. However, sometimes you simply need chlorine bleach for the job. For difficult stains, heavy-duty disinfecting, or odors that won’t go away, chlorine bleach may be the best option. However, it is much challenging to use correctly: it must be carefully measured, added at exactly the right time, and handled with caution to get optimal results. Here are seven tips for using chlorine bleach when washing your clothes.

Use the right amount. It is important to add the correct amount of bleach to the wash. Adding too much can not only prevent them from being cleaned properly but also damage your clothes. Clorox recommends using ½ cup of its bleach products, such as its Splash-less Bleach, in a full wash. However, depending on the brand, the type of bleach you use, and the size of the wash, the amount of bleach needed may vary. Always read the directions on the container to be sure.  

Add bleach at the right time. To get the best results, you should first add detergent to the water, put in the clothes, and run the wash for five minutes. Then add bleach. This will give you the best outcome because adding bleach too early can lower the effectiveness of the detergent. To ensure you don’t forget after starting the wash, set a timer on your phone. However, if you would prefer not to risk forgetting to add bleach (or adding it too late in the process), you can add it right after you add detergent, before putting any clothes in the water. Let it run for 10-15 seconds to ensure the bleach is mixed thoroughly into the water.

Handle with care. Bleach is an extremely strong chemical and can damage your skin if not removed quickly. If you get bleach on your hands while pouring or measuring, stop what you are doing and wash it off with soap right away—don’t wait until you’ve finished getting the load ready to take care of it. Additionally, make sure it is kept and handled in a well-ventilated area. Always close the bottle firmly whenever you are not actively pouring from it. A buildup of chlorine bleach fumes can also cause health problems.

Never mix with other bleach. Never mix chlorine bleach with all-fabric bleach or other household cleaners. This can cause a chemical reaction resulting in a deadly odorless gas. The only thing you should add to a wash along with bleach is detergent—and, of course, your clothes.

Only use it on sturdy clothes. Since it is a stronger chemical, chlorine bleach can damage delicate fabric such as silk. Use it on sturdier material, such as cotton towels and t-shirts. If you are unsure whether a piece of clothing is sturdy enough to stand up to bleach, check the label. Garments that cannot handle bleach will be clearly marked with “Do not bleach” on the washing instructions tag.

Spot test clothes before washing them in bleach. If it is your first time washing an article of clothing with bleach, it is important to make sure the material will not react poorly to the chemical. Synthetic fabrics are particularly prone to damage: white polyester turns yellow when bleached. 

Never apply bleach directly to a garment, however—remember that you dilute it in the wash, so you should do the same for the test. Mix a teaspoon of bleach in two teaspoons of warm water. Then use a cotton swab dipped in the solution to dab an out-of-sight area of the garment, such as an interior pocket or inside seam. Wait for the spot to dry completely. If the color changes at all, or if the color comes off onto the cotton swab, then you should not bleach the garment, as it will come out discolored. You will have to use another method of removing the stain or odor. 

Use a professional. From years of experience, cleaning professionals are skilled in using bleach to get the best results whitening clothes, removing stains, or getting rid of persistent odors. Just let them know the outcome you would like for your clothes when you drop them off, and they can take care of the rest. For additional convenience, you can inquire about pick-up and drop-off services so you can spend less time handling bleach and have more time for things you enjoy.

tips for Using Oxygen Bleach

6 tips for Using Oxygen Bleach

You may be hesitant to use chlorine bleach to clean or remove stains from your clothes. Using the wrong amount, putting it in the washer at the wrong time, or even using it on the wrong fabric can lead to bleach spots, discoloration, or other problems. To make matters worse, it offers no help for removing stains from dyed clothing. Fortunately, there is a new type of bleach that is easier to use than the chlorine bleach you are used to oxygen bleach. Here are 6 tips for using oxygen bleach to clean your clothes.

What Makes Oxygen Bleach Special?

Oxygen bleach is a softer, less corrosive bleaching agent that can be used on both white clothing and colorful fabrics. It will brighten colors rather than remove them. Oxygen is also known as all-fabric bleach.

Use powder rather than liquid bleach. Although both forms are readily available at the store, the compounds in powdered oxygen bleach are more stable than in their liquid counterparts. This means it will last longer and clean more effectively than liquid oxygen bleach. The powder has a shelf life of several years while the liquid has a lifespan of six months before essentially deteriorating into water.

Add it at the right time. Chlorine bleach should be added about five minutes into the wash cycle, but oxygen bleach should be added at the same time as the detergent: before you add any clothes. Always follow the manufacturer’s instructions when determining how much oxygen bleach to add. Use the scoop or measuring device provided with your purchase.

Make sure all the powder dissolves. If you are using all-fabric bleach in powder form, it is important to make sure it dissolves completely in the washer. If you are doing a cold wash, it may not dissolve completely. Simply mix the powder in a small container of hot or warm water first before pouring the solution into the washing machine.

Soak stained clothing before washing. Since oxygen bleach is gentler than chlorine bleach, it needs more time to work its stain-removing, color-brightening magic. Soak stained garments in a separate container (not the washing machine) for an hour at least. You can also soak it overnight, up to eight hours. Like chlorine bleach, it is important to make sure the container is in a well-ventilated area.

Use it on the right type of clothes. Despite the name, all-fabric bleach should not be used on all fabrics. Although it is gentler than chlorine bleach, it is still a strong chemical compound. You should avoid using it on delicate clothing items and delicate fabrics such as silk and wool. Additionally, all-fabric bleach should never be used on clothing with leather sections.

Spot test to be safe. Oxygen bleach will likely not turn dyed clothes white, but it can lighten colors if the dye is poor-quality or unstable. For garments you are especially fond of, it is a good idea to test a properly diluted solution of all-fabric bleach on a small area to see how the fabric and dye react.

Removing Springtime Stains

3 Tips for Removing Springtime Stains

As the weather warms up, it’s natural to spend more time outdoors: walking, jogging, hiking, gardening, picnicking, and enjoying the fresh air. Of course, spending more time outdoors leads to more ways of staining clothes. Read on to learn how to take care of some of the most common stains you’ll encounter this spring.

Let Mud Dry Before Washing

Contrary to what you might expect, you should let the mud dry before doing anything else. Trying to dampen it or rub it off will work it deeper into the cloth. Once the mud is completely dry, scrape away excess. Rub liquid laundry detergent into the stained area and let it sit for 45 minutes. (Note that dish soap should be used instead of laundry detergent if you are cleaning red mud rather than dark mud.) Dampen a toothbrush, clean cloth, or soft-bristled brush with a few drops of water and use it to rub the detergent into the stain. Scrub both sides of the cloth.

 After that, you can machine wash the stained garment as you normally would, but it is best to wash it by itself rather than with other clothing. Repeat the process as needed until the stain is completely gone. Remember to air dry the garment until you are sure the stain has been removed, as machine drying a stained garment will cause the stain to become permanent.

Treat Grass Stains as Soon as Possible

The first key to removing grass stains is to deal with them as soon as possible. The longer you wait to remove a stain, the harder it is to get out. If you are trying to clean an older stain, you will need to soak the garment overnight in a solution of water and oxygen bleach before proceeding with the following steps.

Treat grass stains with a dab of heavy-duty laundry detergent. Some popular brands, such as Tide, contain compounds to break up stubborn stains. You can also use stain remover. Use a damp soft-bristled brush or wet cloth to scrub the affected area, then let it sit 15 minutes. Now that the stain has been treated, you can wash it as usual. Repeat as needed until the stain is gone completely.

Avoid Heat When Treating Blood Stains

Accidents happen. Spending more time outdoors means there are more opportunities for scraped knees, unexpected encounters with thorns, and other accidents. Once you’ve taken care of yourself, you’ll probably want to take care of your clothes as well.

As soon as possible, you’ll want to rinse the affected area in cold water. Never use hot water, as the heat will affect proteins in the blood and embed the stain even further in the fabric. Next, treat the stained area with heavy-duty laundry detergent or a dab of stain remover. Use your fingers or a toothbrush to work the cleaning agent into the area. Let it sit for 15 minutes to work its magic, then wash as usual in cold water.

If the stain remains, soak the garment in a mixture of water and oxygen bleach for four hours, then wash it again. Repeat until the stain is completely gone.

Ask a Professional

Stains are often challenging and time-consuming to remove, but professionals can help you get the best results. From years of experience, cleaning professionals at your local Laundromat know the best treatments and methods to get rid of stains without damaging your clothes in the process. Some also offer pick-up and drop-off services to save you time. Be sure to tell your cleaners what caused the stain so they can use the appropriate cleaning agents.

1 5 6 7 8 9 15


Free Quotes

Receive a complimentary price quote for cleaning services that will fit your needs and your budget

  • This field is for validation purposes and should be left unchanged.

Get A Quote

Do you need a free quote to see how much we can save your business? Just enter the information and we will promptly return a quote. Let us know the types of linens you need serviced and how much your business runs through a week.

Open 362 Days a Year!

Open 7 Days a Week!! Monday - Friday 8:00am to 8:30pm (Last wash is at 8:00), Saturday - Sunday 7:30am to 8:30pm (Last wash is at 8:00). We only Close for Christmas Day, Thanksgiving Day, and the 4th of July!